オラクルLinux7 ブートボリューム拡張方法
オラクルLinux7を作成する際にブートボリュームを100GBで作成したとしても、起動すると40GB程度しかパーティションに割あたっていない。
この仕様は今後変わるかもしれませんが、拡張したい際にボリューム拡張を簡単に行う方法を紹介します。
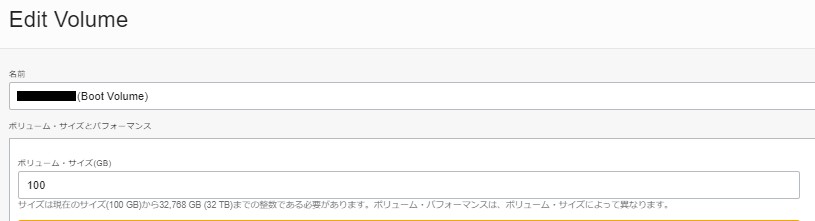
OCIコンソールでブートボリュームの拡張
もともとは48GBのデフォルト値だったので100GBまで拡張します。
するとブロックデバイスの反映コマンドが画面に表示されますのでメモっておきましょう。
sudo dd iflag=direct if=/dev/oracleoci/oraclevda of=/dev/null count=1
echo "1" | sudo tee /sys/class/block/`readlink /dev/oracleoci/oraclevda | cut -d'/' -f 2`/device/rescan
オラクルインスタンスでの拡張作業
現在の設定確認
sdaに46.6GB割当たっています。
[root@test ~]# lsblk
NAME   MAJ:MIN RM  SIZE RO TYPE MOUNTPOINT
sda      8:0    0 46.6G  0 disk
tqsda1   8:1    0  512M  0 part /boot/efi
tqsda2   8:2    0    8G  0 part [SWAP]
mqsda3   8:3    0 38.1G  0 part /
[root@test ~]#
先ほどメモったコマンドを実行する
[root@test ~]# dd iflag=direct if=/dev/oracleoci/oraclevda of=/dev/null count=1
1+0 records in
1+0 records out
512 bytes (512 B) copied, 0.00125832 s, 407 kB/s
[root@test ~]# echo "1" | sudo tee /sys/class/block/`readlink /dev/oracleoci/oraclevda | cut -d'/' -f 2`/device/rescan
1
[root@test ~]#
sdaの容量確認
100GBに拡張されています。
[root@test ~]# lsblk
NAME   MAJ:MIN RM  SIZE RO TYPE MOUNTPOINT
sda      8:0    0  100G  0 disk
tqsda1   8:1    0  512M  0 part /boot/efi
tqsda2   8:2    0    8G  0 part [SWAP]
mqsda3   8:3    0 38.1G  0 part /
[root@test ~]#
しかくブートボリュームは39GBのままです。
[root@test ~]# df -h
Filesystem      Size  Used Avail Use% Mounted on
devtmpfs        462M     0  462M   0% /dev
tmpfs           494M     0  494M   0% /dev/shm
tmpfs           494M   51M  444M  11% /run
tmpfs           494M     0  494M   0% /sys/fs/cgroup
/dev/sda3        39G   19G   20G  48% /
/dev/sda1       512M   12M  501M   3% /boot/efi
tmpfs            99M     0   99M   0% /run/user/994
tmpfs            99M     0   99M   0% /run/user/1000
[root@test ~]#
gdiskのインストールを実施
[root@test ~]# yum install gdisk
growpartコマンドでパーティション拡張を行う
growpartコマンド実行ポイントとして、対象となるフィルシステムの末尾の番号は半角スペースを空ける事
ちなみにsda3を選んだ理由はブートボリューム「/」がsda3に該当するからです。
[root@test ~]# growpart /dev/sda 3
CHANGED: partition=3 start=17827840 old: size=79847424 end=97675264 new: size=191887326 end=209715166
[root@test ~]#
最後ファイルシステムに反映
[root@test ~]# xfs_growfs /
meta-data=/dev/sda3              isize=512    agcount=4, agsize=2495232 blks
         =                       sectsz=4096  attr=2, projid32bit=1
         =                       crc=1        finobt=0 spinodes=0
data     =                       bsize=4096   blocks=9980928, imaxpct=25
         =                       sunit=0      swidth=0 blks
naming   =version 2              bsize=4096   ascii-ci=0 ftype=1
log      =internal               bsize=4096   blocks=4873, version=2
         =                       sectsz=4096  sunit=1 blks, lazy-count=1
realtime =none                   extsz=4096   blocks=0, rtextents=0
data blocks changed from 9980928 to 23985915
[root@test ~]# df -h
Filesystem      Size  Used Avail Use% Mounted on
devtmpfs        462M     0  462M   0% /dev
tmpfs           494M     0  494M   0% /dev/shm
tmpfs           494M   51M  444M  11% /run
tmpfs           494M     0  494M   0% /sys/fs/cgroup
/dev/sda3        92G   19G   74G  20% /
/dev/sda1       512M   12M  501M   3% /boot/efi
tmpfs            99M     0   99M   0% /run/user/994
tmpfs            99M     0   99M   0% /run/user/1000
[root@test ~]#
以上で拡張作業は完了です。
OCIイベント/通知サービスを使ってオブジェクトストレージのアクション通知方法
OCIのイベント/通知サービスを利用することでオブジェクトストレージに対するアクションを通知してくれるようにします。
今回はオブジェクトに対するアクションが発生した場合の通知方法を紹介します。
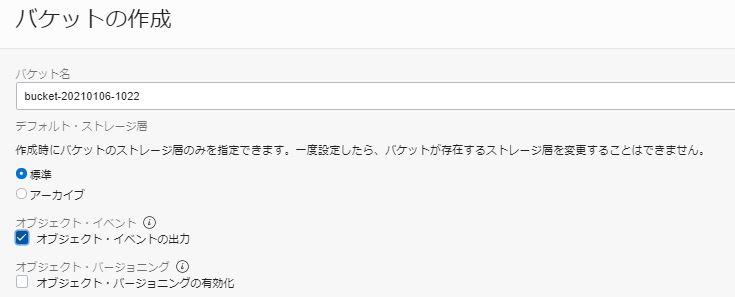
通知サービスでトピックの作成
OCIコンソールの左バーから「アプリケーション統合」>「通知」へ進みます。
トピック作成ですが、トピック名を適当に入力してOKです。
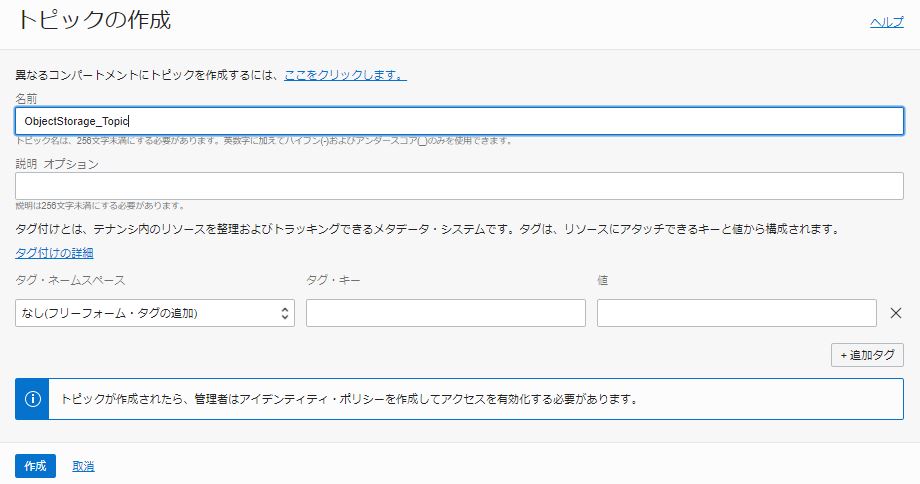
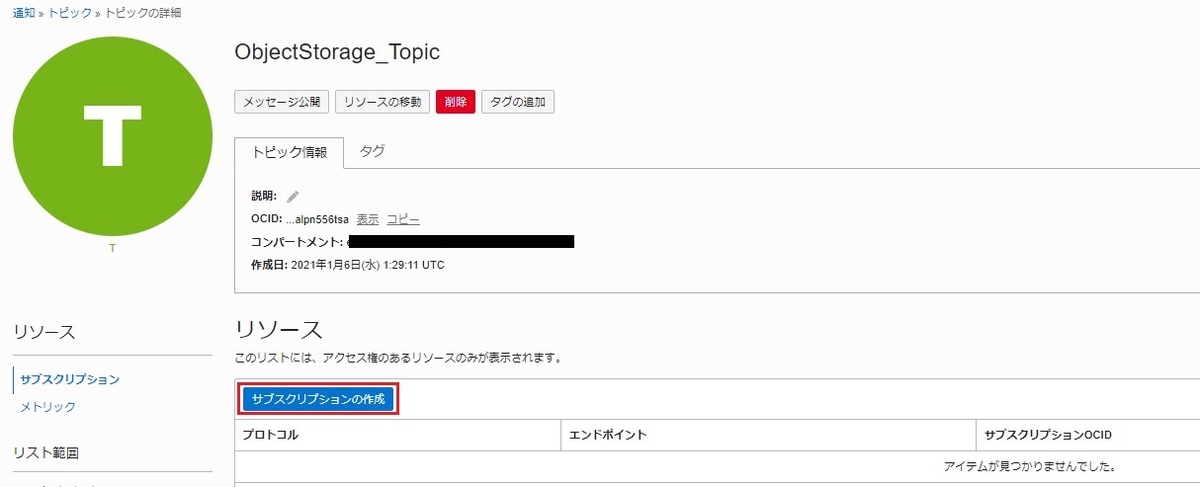
通知サービスでサブスクリプションの作成
作成したトピック画面から「サブスクリプションの作成」をクリック
「サブスクリプションの作成」画面でプロトコルは「電子メール」にし、「電子メール」欄に任意の電子メールを設定します。
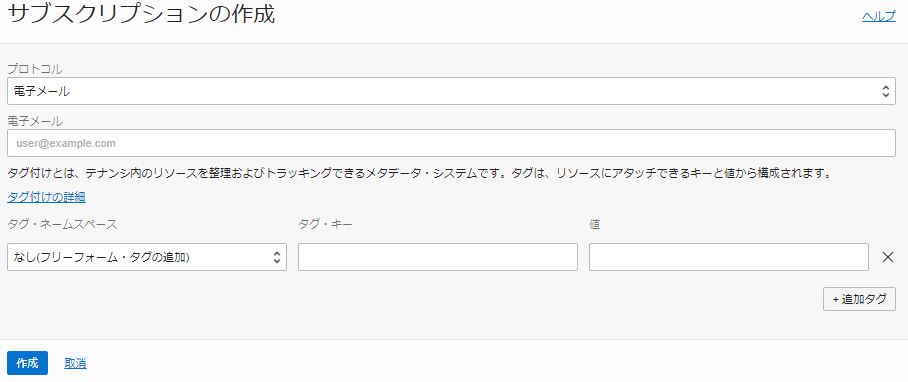
サブスクリプションで設定したメールアドレス宛に確認のメールが届くので有効化しておきましょう
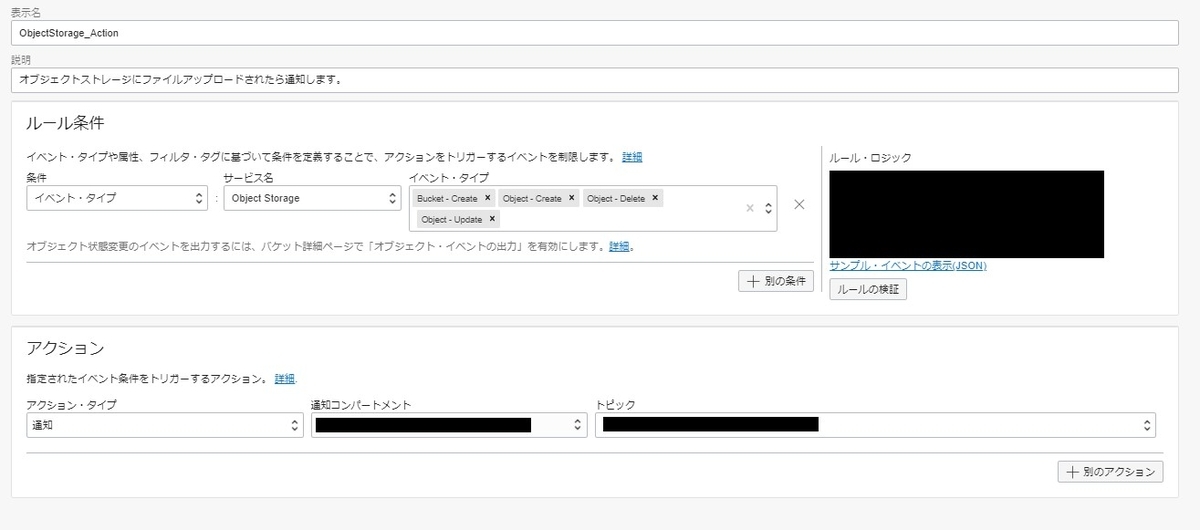
イベントサービスの作成
OCIコンソールの左バーから「アプリケーション統合」>「イベント」へ進みます。
「イベントの作成」をクリック。
「表示名」、「説明」は適当に入力。ルール条件欄で「条件」をイベント・タイプに「サービス名」をObject Storageに「イベント・タイプ」をオブジェクトのアクションに設定。
アクション欄は「通知」を選択し通知先コンパートメントと先ほど作成したトピックを選択します。
以上が設定できましたら「ルールの作成」をクリックします。
これで設定は完了です。あとはREST APIやOCI CLIなどでテストファイルをPUTしてみましょう。
「OCI Event Notification :com.oraclecloud.objectstorage.createobject」と言う件名のメールが届くはずです。
添付ファイルのテキストにアクション情報が記載されています。
GitLab CI/CD パイプライン実行時エラーについて
前回GitLabをインストールしRunner登録までやりました。
今回は簡単なCI/CD パイプラインの実行をやってみたときに出くわしたエラーについて対処していきます。
エラーについて
This job is stuck because the project doesn't have any runners online assigned to it.
日本語だと
プロジェクトにオンラインで割り当てられたランナーがないため、このジョブはスタックしています。

原因と対処方法
原因
Runnerにはタグがありますが、ジョブにタグを設定せずに実行すると個のエラーとなるようです。
対処方法
詳細はこちらを参考ください。
簡単に説明します。
左バーの「Settings」>「CI/CD」>「Runner」へと進み、「Expand」をクリックし詳細画面を開きます。
すると登録したRunner情報が表示されますので下記図のとおり鉛筆マークをクリックします。

鉛筆マークをクリック後、下記図のとおり「Run Untagged Jobs」にチェックマークを入れ「Save Changes」します。
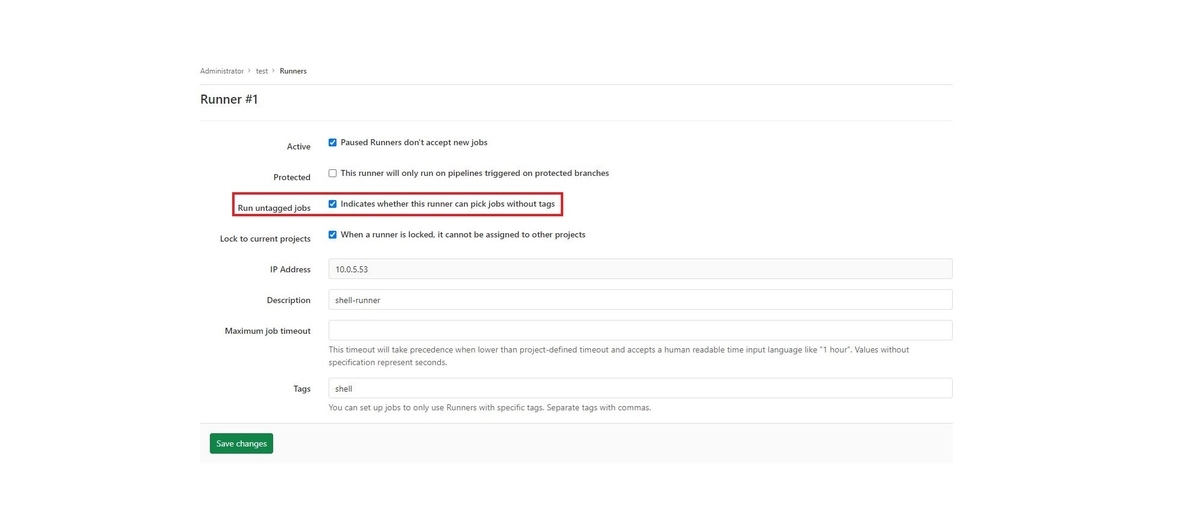
以上で終わりです。
GitLab Runner登録手順
GitLabでCI/CDやるならRunnerは必須でしょ!
と言う事でRunner登録行ってみよ!
今回はRunnerをDockerで動かすためDockerのインストールも含めます。
Dockerのインストール
$ sudo yum install -y docker
$ sudo systemctl enable docker
$ sudo systemctl start docker
GitLab Runnerのインストール
$ sudo wget -O /usr/local/bin/gitlab-runner https://gitlab-runner-downloads.s3.amazonaws.com/latest/binaries/gitlab-runner-linux-amd64
$ sudo chmod +x /usr/local/bin/gitlab-runner
$ sudo useradd --comment 'GitLab Runner' --create-home gitlab-runner --shell /bin/bash
$ sudo /usr/local/bin/gitlab-runner install --user=gitlab-runner --working-directory=/home/gitlab-runner
$ sudo systemctl enable gitlab-runner
$ sudo systemctl start gitlab-runner
GitLab Runnerの登録

トークンの登録
トークン登録は一連の会話形式で登録します。下記にログ残します。
[root@root aws-terraform]# gitlab-runner register
Runtime platform                                    arch=amd64 os=linux pid=27105 revision=943fc252 version=13.7.0
Running in system-mode.

Enter the GitLab instance URL (for example, https://gitlab.com/):
http://192.168.250.52
Enter the registration token:
*******
Enter a description for the runner:
[root.*********.local]: shell-runner
Enter tags for the runner (comma-separated):
shell
Registering runner... succeeded                     runner=-xKw1Xmy
Enter an executor: docker+machine, docker-ssh+machine, kubernetes, custom, docker, parallels, shell, docker-ssh, ssh, virtualbox:
docker
Enter the default Docker image (for example, ruby:2.6):
hashicorp/terraform:latest
Runner registered successfully. Feel free to start it, but if it's running already the config should be automatically reloaded!
[root@root aws-terraform]#
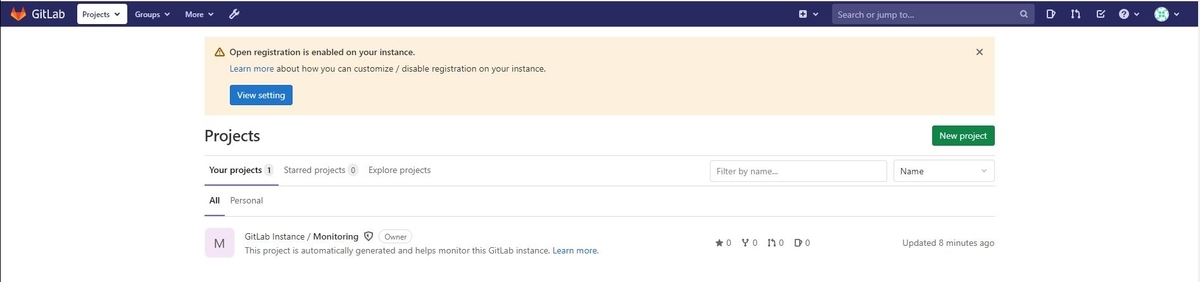
Runner登録確認
再度Runner画面を開き、Runnerが登録されていることを確認する。

CentOS7 にGitLabをインストールしてみる
OCIリソースの管理をTerraform+GitLabでコード管理とCI/CDをやりたくて今回はGitLabのインストールをやってみます。
インストールするのはOmnibus package版のGitLab です。
CentOS環境
CentOS Linux release 7.8.2003 (Core)
依存関係のインストールと設定
$ yum install -y policycoreutils-python
$ firewall-cmd --permanent --add-service=http
$ systemctl reload firewalld
$ yum install -y curl
$ yum install -y openssh-server openssh-clients
$ systemctl enable sshd
$ systemctl start sshd
$ yum install postfix
$ systemctl enable postfix
$ systemctl start postfix
リポジトリを追加
$ curl -sS https://packages.gitlab.com/install/repositories/gitlab/gitlab-ce/script.rpm.sh | sudo bash
ログインしてみる
本当は http://192.168.250.52 にアクセスするとパスワードの変更画面が先に出てくるのですが、スクショ取るの忘れちゃいました。。
パスワード設定後は下記のログイン画面へ遷移します。

問題なくログインできました。次はGitLab CI/CDやりたいですね!
Terraformで適当に AWS VPCを作ってみる
variables.tfを書いていこう!
provider "aws" {
  version = "~> 2.0"
  region  = "ap-northeast-1"
}
はい、次
main.tfを書くぞ!
resource "aws_vpc" "main" {
  cidr_block = "10.0.0.0/16"

  tags = {
    Name = "handson"
  }
}
シンプル イズ ベスト!!
お・わ・り
おまけ
[root@localhost aws]# terraform apply

An execution plan has been generated and is shown below.
Resource actions are indicated with the following symbols:
  + create

Terraform will perform the following actions:

  # aws_vpc.main will be created
  + resource "aws_vpc" "main" {
      + arn                              = (known after apply)
      + assign_generated_ipv6_cidr_block = false
      + cidr_block                       = "10.0.0.0/16"
      + default_network_acl_id           = (known after apply)
      + default_route_table_id           = (known after apply)
      + default_security_group_id        = (known after apply)
      + dhcp_options_id                  = (known after apply)
      + enable_classiclink               = (known after apply)
      + enable_classiclink_dns_support   = (known after apply)
      + enable_dns_hostnames             = (known after apply)
      + enable_dns_support               = true
      + id                               = (known after apply)
      + instance_tenancy                 = "default"
      + ipv6_association_id              = (known after apply)
      + ipv6_cidr_block                  = (known after apply)
      + main_route_table_id              = (known after apply)
      + owner_id                         = (known after apply)
      + tags                             = {
          + "Name" = "handson"
        }
    }

Plan: 1 to add, 0 to change, 0 to destroy.


Warning: Version constraints inside provider configuration blocks are deprecated

  on variables.tf line 2, in provider "aws":
   2:   version = "~> 2.0"

Terraform 0.13 and earlier allowed provider version constraints inside the
provider configuration block, but that is now deprecated and will be removed
in a future version of Terraform. To silence this warning, move the provider
version constraint into the required_providers block.

Do you want to perform these actions?
  Terraform will perform the actions described above.
  Only 'yes' will be accepted to approve.

  Enter a value: yes

aws_vpc.main: Creating...
aws_vpc.main: Creation complete after 2s [id=vpc-0207ab******5e4b]

Apply complete! Resources: 1 added, 0 changed, 0 destroyed.
[root@localhost aws]#
今更ながらCentOS7にAWS CLI入れてみる
公式ドキュメントを参照
AWS CLIのインストール
$ curl "https://awscli.amazonaws.com/awscli-exe-linux-x86_64.zip" -o "awscliv2.zip"
$ unzip awscliv2.zip
$ sudo ./aws/install
installすると下記出力となる
[root@localhost aws]# ./aws/install
You can now run: /usr/local/bin/aws --version
バージョン確認
[root@localhost aws]# aws --version
aws-cli/2.1.14 Python/3.7.3 Linux/3.10.0-1127.el7.x86_64 exe/x86_64.centos.7 prompt/off
はい。おしまい!